 minute read
A ViKING POS Designer diagram is a user interface design that supports all the workflows that your target groups need. You'll typically only have one diagram, but if your organization owns several chains of stores, you may design separate diagrams for each chain to reflect each chain's workflows, branding, etc.
Template diagrams
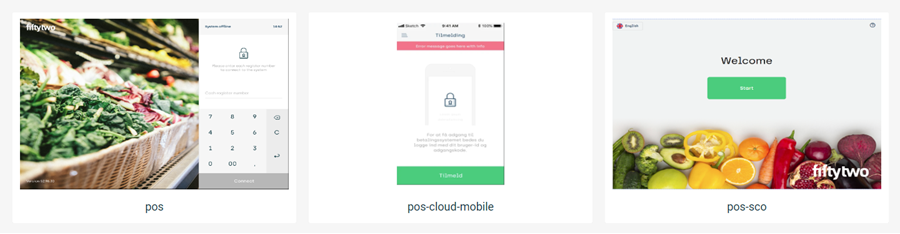
ViKING POS Designer comes with ready-to-use template diagrams that helps you quickly create POS user interfaces for:
The templates contain what's necessary to get started, and you can easily customize them with your organization's own logos, colors, images, etc.
You can of course also add, edit, or remove layouts and components to add or change entire POS workflows once you've familiarized yourself with the templates.
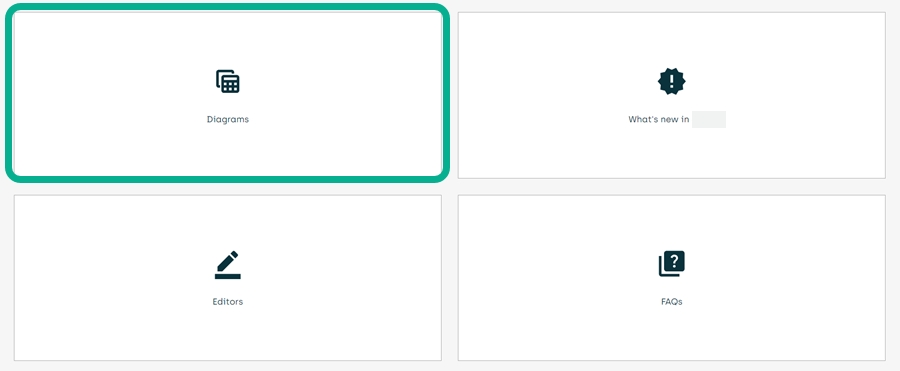
To access the templates, select Diagrams after you've logged in to POS Designer:
Add new diagram
No matter whether you want to use one of the templates or you want to create a new diagram from scratch instead of using one of the templates, you can add a new diagram in two ways:
-
Select the Explorer tab in the dark bar in the left side of the POS Designer.
-
In the Diagram field, click the plus sign
 .
. -
In the Diagram name field, specify a name for the new diagram.
The name can't contain spaces.
-
If you want to add a diagram that based on one of the templates, select the required template in the Diagram template field. Leave the field blank if you want to create a new diagram from scratch.
-
Click Create.
- or -
-
In the POS Designer top menu, click
 to expand the menu.
-
In the upper part of the expanded menu, click Create new diagram and follow the instructions in the previous.
Clone existing diagram
-
In the POS Designer top menu, click
to expand the menu.
-
In the upper part of the expanded menu, click Clone diagram
-
Specify a name for the new diagram
The name can't contain spaces.
-
Select the diagram that you want to copy, and then click Clone
Diagram theme
When you've added a diagram, and you begin to add layouts and components, you can edit individual components' properties to control how they look. However, you can also control the general look and feel of a diagram and its layouts and components on a higher level: through a theme.
The theme lets you control the styles, that is the look and feel, of the components on your diagram's layouts from a single central location rather than for each individual component at a time. This saves time and ensures consistency.
Example: In the diagram's theme, you can define that all buttons that you add to the diagram's layouts should have a certain look based on their common properties for background color, font, font color, position of any icons, rounding of button corners, etc. You can even define similar settings for a secondary button type if required
Edit diagram's theme
You can edit a diagram's theme this way:
To get a common look and feel across your diagram's layouts, it's a good idea to make any edits to the diagram's theme before you begin to add layouts and components. That's because if you've already styled some components individually on your layouts, those individually styled components will not be affected by general theme changes, and that can lead to an inconsistent look of, for example, toolbars or buttons across your layouts.
It's often a good idea to create a test diagram with relevant layouts and components and use that test diagram to view the effect of your theme changes. You can use the Clone feature to quickly create a test diagram based on an existing diagram. Once you're happy with the theme's look and feel, you can then rename the test diagram and begin using it for real.
-
Make sure that you've opened the required diagram
-
In the POS Designer top menu, click
to expand the menu.
-
In the upper part of the expanded menu, click Edit theme
-
In the Customize styles (using diagram theme) dialog, you can edit the following styles:
-
Default styles
-
Toolbar styles
-
List component styles
-
Journal component styles
-
Total component styles
-
Button styles
-
Secondary button styles
-
Label styles
-
Language selector styles
-
Menu styles
-
Notification hint styles
-
Dialog styles
-
Message display styles
-
Keyboard component styles
-
Panel button styles
-
View group styles
-
Form styles
-
Prompt styles
To learn more about the various components whose look and feel the styles control, see ViKING POS Designer components.
-
-
When ready, click Save
Add layouts and components to diagram
As described in the topic ViKING POS Designer, a diagram contains layouts, and layouts contain components. Together, they make it possible for till users to complete all required workflows.
-
For information about how to add a layout to a diagram, see ViKING POS Designer layouts
-
For information about how to add components to a layout, see ViKING POS Designer components
Edit POS triggers
POS triggers are events exposed by a till, for example the event that an ongoing purchase order state has changed so that content in the till display's journal component must be updated. Triggers are typically used to control steps in workflows as well as to display prompts, that is messages that the shop assistant must react to.
POS Designer comes with a set of triggers that are enabled by default. These default triggers cover typical scenarios. If you want to view the default triggers, or select fewer or more triggers for your diagram, do the following:
-
Select the Explorer tab in the dark bar in the left side of the POS Designer.
-
In the Diagram field, click the
 Edit diagram icon:
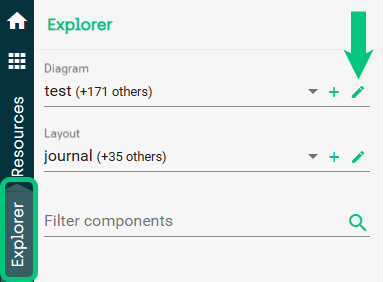
-
Expand the POS triggers section.
-
If you place your pointer over the name of a trigger in the list, and then over the
 icon, you can view a description of the trigger.
 -
If required, edit the trigger selection to match your needs. When ready click Save.
Test diagram on specific till
When you design your diagram, you can launch it on a specific till to test and debug your diagram from the computer on which you work with POS Designer.
-
In the POS Designer top menu, click
to expand the menu.
-
In the upper part of the expanded menu, click Launch package.
-
Select the required Protocol (HTTP or HTTPS). Then, in the POS API host field, specify the IP address and port number of the required till.
-
Select if you want to launch the diagram in a new window or a new tab.
-
Click the Test connection button to the right to verify connection to the till in question.
-
If the connection works, click the Launch POS UI button to the left to launch the diagram on the till in question.
Publish package
When you're finished designing your diagram, you can publish it to the POS Designer server as a package.
The publishing feature requires that your organization has set up a publishing workflow. Ask your Fiftytwo administrator if you're in doubt.
If you've previously published packages, publishing the latest version of the package will not overwrite previously published package versions.
-
In the POS Designer top menu, click
to expand the menu.
-
In the upper part of the expanded menu, click Publish package
-
You're able to enter a Description of the changes and improvements you've made to the latest version of the diagram. Such information can later be valuable for yourself as well as any colleagues.
-
When ready, click Publish.
 When you or your colleagues later want to view which changes were made in published versions of a diagram, click the change log icon in the dark bar in the right side of the POS Designer to view information about author and changes.
Example: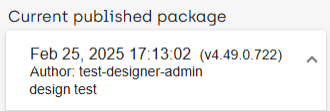 .
.
Get latest published package
If you or others have published a diagram as a package (see the previous), you can get the latest version of the package.
-
In the POS Designer top menu, click
to expand the menu.
-
In the upper part of the expanded menu, click Get latest published.
-
A dialog will ask you whether to use the package for tills' primary or secondary displays.
-
A till's primary display is typically the display that a shop assistant uses
-
A till's secondary display is typically a customer-facing display
-
Depending on the diagram, you may also be able to select other display types
If required, you can select more than one option, for example both Primary and Secondary.
You define a given till's primary and secondary displays as part of the individual till's configuration (see Manage tills in ViKING Store Management).
-
-
When ready, click Download.
Send diagram to another POS Designer instance
You can send a diagram to another instance of POS Designer, for example if you're working with a colleague, who should be able to take over your work.
-
In the POS Designer top menu, click
to expand the menu.
-
In the right side of the upper part of the expanded menu, click the
 menu
menu -
Select Send diagram
-
Select the required Protocol (HTTP or HTTPS).
-
In the API host field, specify the IP address or hostname of the computer that runs the POS Designer instance that you want to send the diagram to
By default, POS Designer uses port 7002 when sending diagrams between two instances. You can specify another port number if required.
-
Select Show advanced settings and select any of the advanced settings that are relevant for you:
-
Send as: By default, POS Designer will send the diagram with a name based on this structure: [diagram name]-export. You can change this to another name if required.
The name can't contain spaces.
-
Overwrite diagram (if exists): With this option you can make the diagram that you send automatically overwrite any existing diagram with the same name on the receiving instance of POS Designer.
Use with caution. It's a good idea to speak with the people who use the receiving instance of POS Designer before you select this option.
-
-
You can't send the diagram until your POS Designer has checked that there's a valid instance of POS Designer at the receiving end. Click Verify API to perform the check
-
If the check is successful, the Send button becomes available, and you can click it to send the diagram
Archive and restore diagram
When you archive a diagram, you save a snapshot of it on the server, so that you can later return to the diagram's state at the time that it was archived. Archiving can be useful, for example, if you experiment a lot with your diagram's content and workflows, and you want to be able to return to a previous state of the diagram.
-
In the POS Designer top menu, click
to expand the menu.
-
In the upper part of the expanded menu, click Archive diagram.
Restore diagram from archive
-
In the POS Designer top menu, click
to expand the menu.
-
In the right side of the upper part of the expanded menu, click the
menu -
Select Restore diagram, and then select the required diagram version from the archive
Autosave
As an alternative to saving your changes manually, you can use autosave:
-
In the POS Designer top menu, click
to expand the menu.
-
In the upper part of the expanded menu, click the Autosave toggle switch to turn autosave on or off.
-
When you turn autosave on, it asks you specify a delay in seconds. Changes will automatically be saved after that delay.
-
Click Apply.
Keyboard shortcuts
![]() When you work with diagrams, POS Designer offers keyboard shortcuts that help you quickly perform often-used tasks.
When you work with diagrams, POS Designer offers keyboard shortcuts that help you quickly perform often-used tasks.
To view a list of keyboard shortcuts, click the help icon in the lower right side of POS Designer, and select Keyboard shortcuts.
Typical next step: Add layouts to your diagram
© 2026 Fiftytwo A/S • Disclaimer
Last update: 29 May, 2026 12:21:08 CET
Share this page with your colleagues: