52ViKING POS (Point-Of-Sale) is an extremely flexible and feature-rich web-based user interface for shop assistants who handle sales in supermarkets and other stores.
Despite being feature-rich, 52ViKING POS is never overwhelming because it only displays the features that the shop assistant needs in any given situation.
There are two levels of logging in to the display:
-
First, someone needs to log in to get access to the till itself. Until someone logs in to get access to the till itself, the till is offline and can't be used. The person who logs in to the till itself may be a supervisor or the operator. The login to the till itself lasts for as long as the till is open, perhaps for an entire day. To make the till go offline again, someone needs to sign off.
-
Secondly, the shop assistant needs to log in. Some organizations require salespersons to log in before each transaction. In such organizations, salespersons are typically logged out automatically after they complete a transaction. In other organizations, salespersons may log in when they begin their shift at the till, and then manually log out when they need a break or end their shift at the till.
Salesperson is one of two roles that a shop assistant can have. The roles have to do with responsibility for the till's money. Read more in 52ViKING POS shop assistant roles.
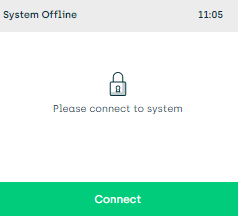
When you approach a till that's offline, the display will say System offline.
-
Tap the green Connect button
-
Use the display's keypad or the attached keyboard to enter the till access code
-
Tap the green Log in button
Now the till is online, and it's possible to log in as a shop assistant.
When a till is online, you can log in to the till as a shop assistant. The display will ask you to enter your shop assistant number and in many cases also a passcode.
-
Use the display's keypad or the attached keyboard to enter your number and passcode
-
Tap the green Log in button
Now you're ready to work. See these topics for more information:
If required, you can change your passcode on the till. Your supervisor can delete your passcode, in which case the display will ask you to specify a new passcode. When you specify a new passcode, you can't reuse any of your most recent passcodes.
When you log in to the 52ViKING web-based POS UI (Point-Of-Sale User Interface) display, you'll find that it typically has two main sections.
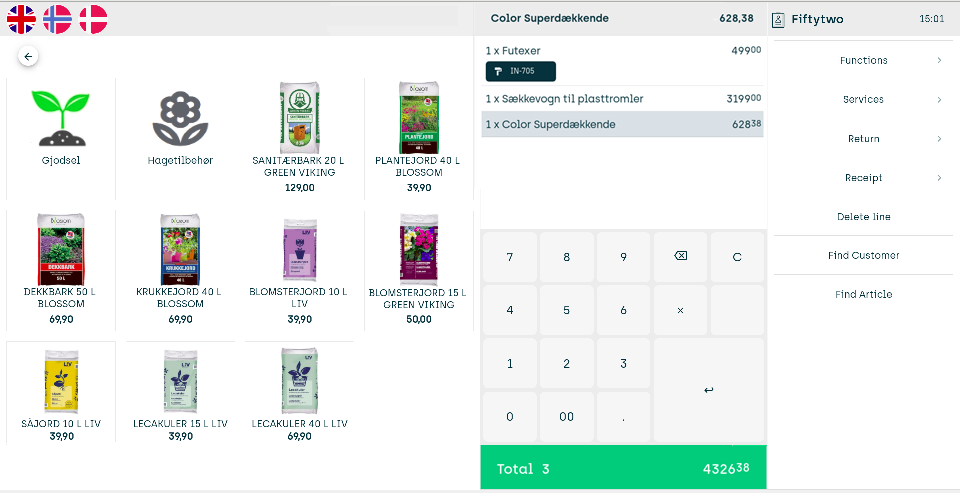
|
Left side |
Right side |
|---|---|
|
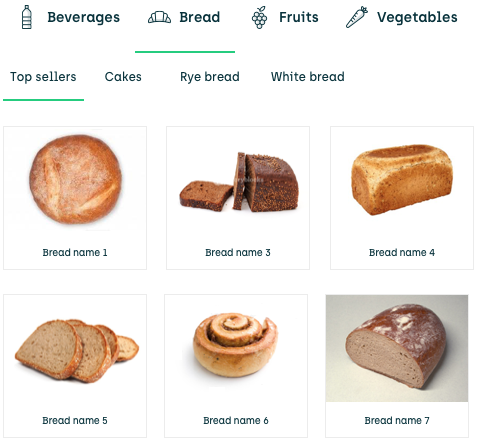
In supermarkets, bakeries, and other stores, where many articles don't have barcodes, the left side of the display typically contains buttons that users can tap to sell bread, fruit, vegetables, drinks, etc. Hardware and DIY stores, garden centers, etc. sometimes also use such buttons because some of their articles can be so bulky that they're difficult to scan, even though they do have barcodes. The buttons, sometimes called PLU buttons, are often grouped by article type, and may contain several levels of subgroups. Example (click thumbnail to view image in full size): In other organizations, the left side of the display may contain tabs that each let you handle specific tasks, for example:
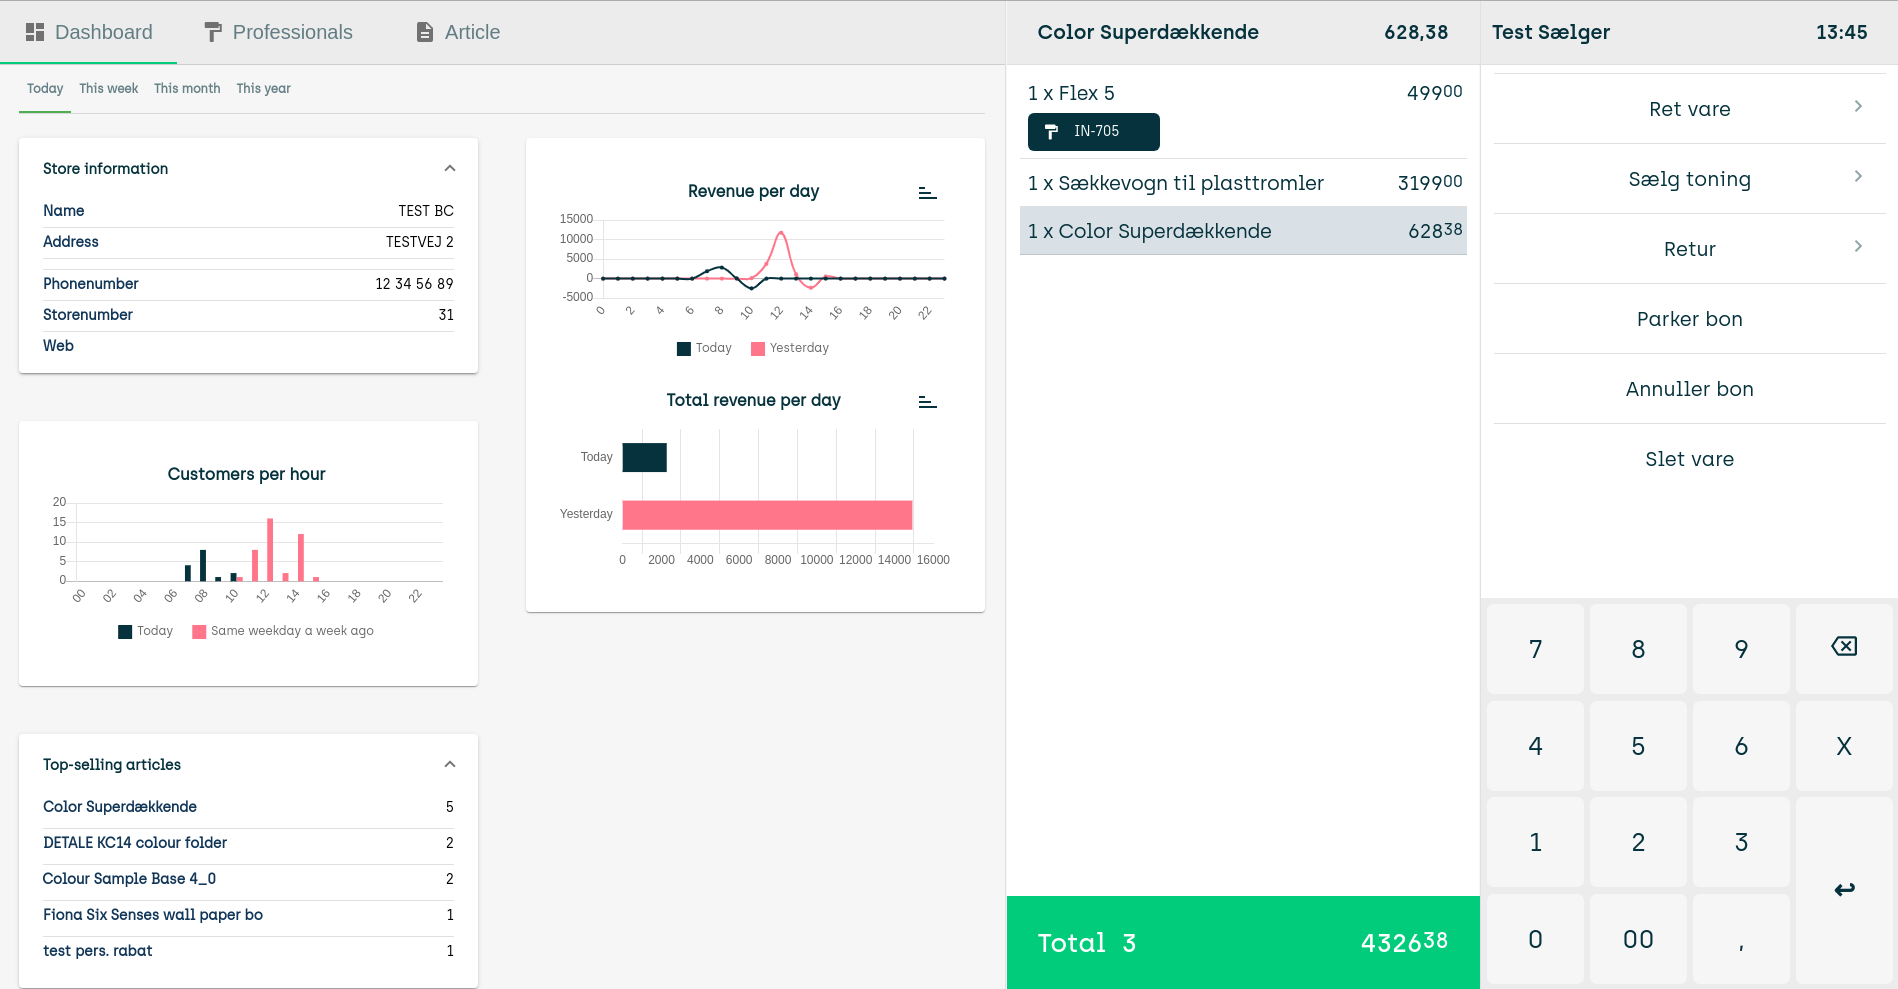
Example of display that uses the left side to provide access to features on tabs, in this case sales statistics (click thumbnail to view image in full size): In supermarkets, bakeries, and other stores, who use the left side of the display to sell bread, fruit, etc., you typically find features like article search, customer handling, etc. in the menu in the right side of the display. |
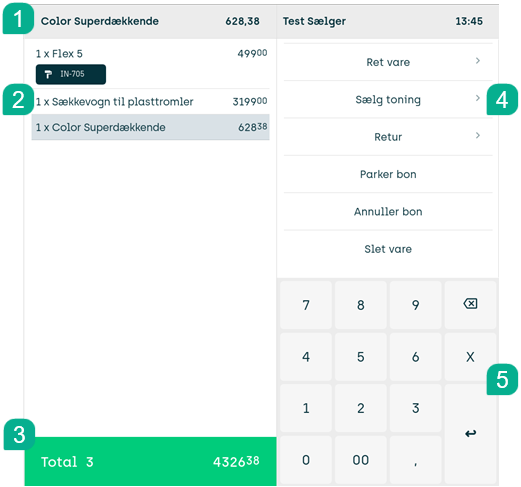
The right side of the display is where you sell articles, grant discounts, get payment, handle returns, do cash statements, etc. It contains the journal (the area where you build up the customer's purchase order when you scan or manually enter article numbers) as well as a keypad and a menu with relevant features. Example (click thumbnail to view image in full size): The menu's content changes depending on what you're working on. Example: While you scan articles, the menu doesn't display any payment buttons. However, as soon as you complete the sale and become ready to receive payment, the menu automatically displays buttons for card payment, cash payment, etc. In organizations that don't use the left side of the display for tabs with features like article search, customer handling, etc., the menu in the right side of the display typically provides access to such features. |
In some organizations, you must register the till's start cash amount. Ask your supervisor if you're in doubt.
To register the till's start amount, most organizations use the Add funds feature after you've logged in to the till and registered your shop assistant number.
The display has no log out feature as such. Instead, you can do the following:
-
Switch shop assistant: If you reach the end of your shift, need a break, or otherwise need to hand an online till over to a colleague, tap Change clerk in the menu. This will effectively log you out and prompt a colleague to enter their shop assistant number in order to log in to the till.
Some organizations require salespersons to log in before each transaction. In such organizations, salespersons are typically logged out automatically after they complete a transaction. In effect, what happens automatically is the same as when you tap Change clerk in the menu.
Your organization may have important procedures for how to handle the till's cash drawer that you need to follow when you switch operators. Ask your supervisor if you're in doubt.
-
Sign off: If you don't need a till to be active anymore, tap Functions > Sign off in the menu. This will make the till go offline. When you need to use the till again, someone must log in to the till.
Additionally, your organization may for security reasons automatically apply the Change clerk or Sign off features after a configurable period of inactivity. Ask your supervisor if you're in doubt.
In some organizations, POSs use audio on certain user actions, for example when you tap a button. Audio is typically a simple sound, but it may also be a spoken word message that guides the user, especially on self-service checkouts (SCOs).
You can typically adjust the audio level in 52ViKING POS:
-
On the display, tap the audio
 icon.
icon. -
An audio adjustment slider appears. Example:

-
To adjust the volume, drag the slider to the required level (or tap the plus/minus buttons next to the slider if they're available).
-
When you've adjusted volume, the slider will automatically disappear after a short while.
If you don't want to wait for the slider to disappear, simply tap the display outside of the slider to make the slider go away instantly.
If a POS uses audio, but you can't find the audio  icon in order to adjust volume on the POS, ask your supervisor.
The display runs in a browser. In order to let you concentrate on your work at the till, the browser by default runs in full-screen-mode, and by default you can't change that.
However, in some organizations, you may be allowed to toggle the full-screen mode off and on, for example if you temporarily need to use another browser tab or another program.
To toggle full-screen mode off in such organizations, press F11 on the physical keyboard that's attached to the till. To toggle full-screen-mode back on, press F11 again.
If you leave full-screen mode, the display will run in a regular browser tab that you can close. If you close the tab, the display will stop working, and you'll not be able to use the till until you've reopened the tab, for example via a bookmark.
If you leave full-screen mode, you can pin the tab that runs the display to prevent that you accidentally close it. To pin the tab that runs the display, right-click the tab, and select Pin or Pin Tab. This will remove the tab's close button. Pinning the tab, however, will not prevent you from being able to accidentally close the browser window itself.
A 52ViKING POS till can be in training mode.
![]() Training mode means that transactions that you perform on the till aren't real ones, so that they're not sent to your organization's finance system. Training mode is thus ideal for new or inexperienced shop assistants, who must learn how to use the POS system before they serve real customers. When a till is in training mode, the display shows a training mode icon in the area above the journal.
Training mode means that transactions that you perform on the till aren't real ones, so that they're not sent to your organization's finance system. Training mode is thus ideal for new or inexperienced shop assistants, who must learn how to use the POS system before they serve real customers. When a till is in training mode, the display shows a training mode icon in the area above the journal.
When you don't need the till to be in training mode anymore, it's important that your supervisor or POS system administrator switches the till back to normal mode, so that the till's transactions will again be sent to your organization's finance system.
Related: Handle sales in 52ViKING POS
Related: Handle returns in 52ViKING POS
Related: Search for articles in 52ViKING POS
Related: 52ViKING POS till management (cash statements, etc.)
Related: Register new customer in 52ViKING POS
Related: Handle B2B customers in 52ViKING POS
Related: 52ViKING POS dashboard
Related: Manage campaigns in 52ViKING POS
© 2026 Fiftytwo A/S • Disclaimer
Last update: 02 February, 2026 14:25:03 CET
Share this page with your colleagues:
